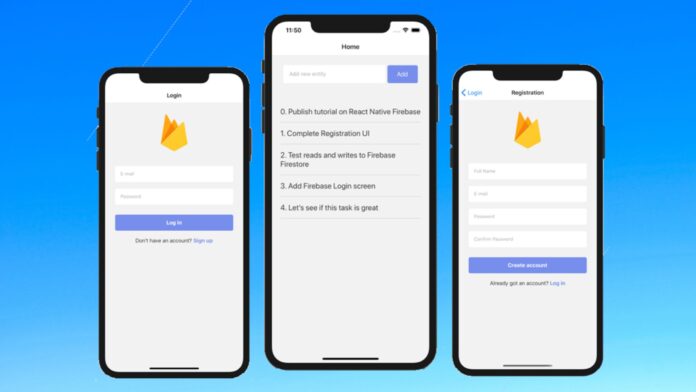
A Stackoverflow survey predicts that React Native sits at the 5th position from the top in terms of cross-platform app development framework. The survey was solely participated by professional developers. About 16.48 percent of the participants responded that React Native is the most useful framework for developing cross-platform apps.
As a developer, you also want to keep your app secure from hackers or unwanted access. This is what firebase authentication can help you with.
So, go through this blog to learn the steps of getting firebase authentication in the React Native app with React Native development services.
Insight into the theoretical context
Here, you will get basic theoretical knowledge of firebase and its authentication process. So, let’s get started.
What is called a firebase?
You can refer to Firebase as the mobile app-making platform. It is backed up by google. It is such a platform with which you can make your apps more scalable by improving their quality. With this Firebase platform and integrating your app with this platform, you can avail services like Realtime Database, Firebase Hosting, Cloud Storage, Cloud Firestore, cloud functions, and Authentication. So, you see, using firebase in your apps opens up greater possibilities for the app.
What does Authentication mean in Firebase?
Authentication in the Firebase platform is only the way to maintain data security and at the same time ensure data safety. Users have to go through the steps of authenticating while logging in to a certain app. Thus it is a way to validate the user’s originality. You can also get personalized experiences with firebase authentication. It is accessible across all the devices of users.
Further, with firebase authentication, you can get backend services, UI libraries, and cross-platform software development Kits.
Understanding the backend operations of firebase authentication
The backend operations are all about learning the work process of authentication in Firebase, i.e. how users can get a successful sign-in to their app.
Firstly, they have to provide their credentials as in password, OAuth token, or email ID. Now, this information will pass on to the SDK linked with the Firebase authentication. The backend services will come into action for the verification of the credentials. If the credentials are verified, the client servers will get data to allow the user access.
Now, we will start with the main steps of implementing firebase authentication in the React Native app.
Step 1: Build a React Native app
In this blog, you will learn how to implement Firebase authentication in your app. So, it goes without saying that you have to start the steps with a React Native app.
If you already have an app, you can implement firebase authentication in it. In the other case, you have to start your journey by configuring React Native environment and building a basic app using React Native framework.
If you are looking for reliable guidance, you can check the two tutorial blogs. Of which, one is on ‘How to set up the React Native Development Environment’ and the other one is on ‘How to create and run React Native app in android phone’.
Step 2: Build a Firebase project
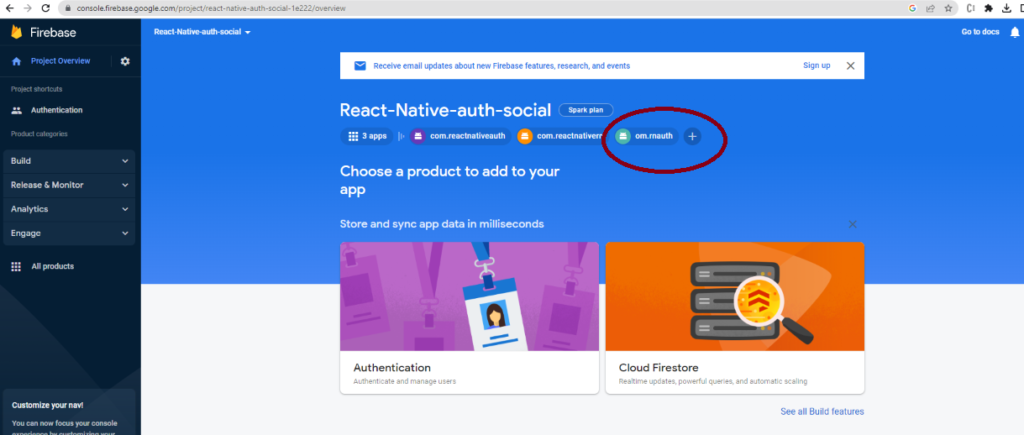
As you are done with creating a React Native app, you have to open the link: https://console.firebase.google.com/u/0/?pli=1 and press the ‘Add Project’ button. Here, you have to give your project a unique name. I have given it as React-Native-auth-social. This is all about step 1.
In step 2, you need to disable the option: ‘Google Analytics’. Click on the pressable button ‘Create Project’. This way, you will build the Firebase project.
Step 3: Authenticating to a specific platform
As you have made the Firebase project, search for the ‘authentication’ button on the left column of the homepage of https://console.firebase.google.com/u/0/project/react-native-auth-social/overview. Click on the same.
You will find an option ‘Get Started’. Press the button. As it takes time to open the next page. Hold for some time. Now, you will be directed to different sign-in options such as Google, Facebook, Twitter, and others. Here, I have clicked on the Google option. Clicking on the ‘Google sign-in’ option will enable your project to authenticate with Google.
You need to press the ‘Enable’ button. Also, you have to provide an email id. Save the entire process. You will see the status of Google is enabled for your project.
Find the ‘project overview’ option and go forward clicking on the blue android logo on the screen. This will take you to a screen where you have to add data about the android package name and the SHA-1 signing certificate.
For these two data, you have to open your app on the code editor. Go to the androidManifest.xml file. Here you will get the package name, specified as package=’….’. Copy and paste wherever asked. On the other hand, for the SHA-1 key, get the ‘Authentication module’ package.
Now, open a project terminal on the code editor and pass npm add @react-native-firebase/auth. This will get you the package. Following this, you need to pass cd android and then ./gradlew signingReport on the same terminal. A set of SHA-1 keys will be generated. Copy the SHA-1 key mentioned under the section Variant: debugAndroidTest and paste the key on the firebase page. Press the ‘Register app’ button.
Now, you have to go to the console screen. For this, press ‘Next’ and then click on ‘Continue to console’. You will get a screen similar to image 1. Click on the encircled section.

It will open the settings page of the currently created project. Now, you have to add a different SHA-1 key. This time it will be from the ‘release’ variant. Open the previous project terminal and find the SHA-1 key from the release variant. However, for this, you have to press the ‘Add fingerprint’ option and paste the key. Move forward after saving the complete step.
Step 4: Setting up the Firebase project with Android credentials
Here, you have to download the package: ‘google-services.json’. You can get it from the same settings page of your project. Now, you have to add the package to your app directory. For this, go to android and then the app folder on your React Native app folder. Paste the ‘google-services.json’ package.
Following this, you have to add some dependencies. Open the link: rnfirebase.io and copy classpath ‘com.google.gms:google-services:4.3.14‘. Also, open the code editor from your app folder and go to android →build.gradle. Paste the line to ./android./build.gradle under dependencies.
Also, go to the same link rnfirebase.io, and find the line apply plugin: ‘com.google.gms.google-services’. Open android →app→ build.gradle from your code editor. Paste the line on the second line. Refer to image 2

Save the process and you are done with integrating Firebase authentication in your React Native app.
There are further steps to getting the interface of Google sign-in in your app. However, we will not cover this segment in this tutorial blog. For this, you can visit the attached tutorial blog. The current blog is only about guiding the fundamental steps of implementing firebase authentication to my React Native app.


